Homemade Maple Ice Cream: Your Silky Smooth Indulgence for Autumn Evenings
As the leaves begin to turn vibrant shades of red and gold, and a crisp coolness fills the air, our thoughts inevitably drift towards comforting fall flavors. While pumpkin spice often takes center stage, there's a timeless, rustic sweetness that truly captures the essence of autumn: maple. And what better way to savor this rich, earthy delight than in a scoop of perfectly smooth, homemade maple ice cream? Forget bland, store-bought versions; this recipe promises a wonderfully creamy texture and an intense maple flavor that will elevate any fall dessert, or stand proudly on its own. It's a taste of pure autumnal bliss, made right in your kitchen.
Why Homemade Maple Ice Cream is a Fall Dessert Game-Changer
There’s a certain magic that happens when you create something from scratch, especially a dessert as luxurious as ice cream. Our
homemade maple ice cream isn't just a treat; it’s an experience. Its perfectly creamy and simply silky smooth texture sets it apart, offering a mouthfeel that store-bought varieties rarely achieve. But beyond its incredible texture, it’s the rich, authentic maple flavor that makes it an absolute showstopper.
This isn't just an ice cream; it's the ideal companion for so many beloved fall desserts. Imagine a generous scoop melting slowly over a warm, spiced apple crisp, enhancing every bite with its sweet, comforting embrace. It's equally divine paired with a classic apple pie, a rich pecan pie, or the traditional pumpkin pie, adding a sophisticated depth of flavor that complements rather than overshadows. While some desserts, like a tart cherry pie, might call for classic vanilla, for the vast majority of autumn indulgences,
homemade maple ice cream truly wins the dessert pairing contest. The combination of its creamy maple notes with the spiced, fruity flavors of fall is simply unparalleled, particularly when it comes to apple-based dishes. Plus, the convenience of being able to make it ahead and freeze it means you'll always have a firm, ready-to-serve dessert enhancer waiting for your next autumn gathering.
The Secret to Unforgettable Maple Flavor: Choosing Your Syrup Wisely
If you share a deep affection for maple, like many of us do, then you understand that not all maple syrups are created equal. The undeniable key to an amazingly delicious
homemade maple ice cream lies in using *real*, high-quality maple syrup. This is where you absolutely must bypass any imitation "pancake syrup" that lacks the genuine depth and complexity of true maple. Authentic maple syrup, harvested from maple trees, is the soul of this recipe.
When you venture to select your maple syrup, you'll encounter different grades, primarily **Grade A** and **Grade B**. Understanding the distinction is crucial for achieving the perfect flavor profile for your ice cream:
* **Grade A:** This is the most popular grade, known for its lighter color, milder maple flavor, and relatively thinner consistency. It's often the go-to for topping pancakes, waffles, or as a general sweetener. Grade A syrup is typically collected earlier in the maple tapping season.
* **Grade B:** Historically darker and with a much stronger, more robust maple flavor, Grade B syrup was the baker’s secret weapon. It also tended to be a bit thicker. While the grading system has since been updated, what was once "Grade B" is now often labeled as "Grade A Dark, Robust Taste." This darker, more intensely flavored syrup is precisely what you want for this ice cream. Its potent flavor stands up beautifully to the richness of the cream and eggs, ensuring that the maple truly shines through, rather than getting lost.
For our
homemade maple ice cream, we emphatically recommend choosing a **darkest available** or "Grade A Dark, Robust Taste" maple syrup. This ensures that every spoonful delivers a wonderfully strong, authentic maple punch. The slight thickness also contributes to a richer mouthfeel. While both grades are interchangeable in terms of what works in a recipe, for that deep, undeniable maple essence, the darker, bolder variety is your best bet. To delve deeper into the nuances of maple syrup grades and why the darker varieties are often superior for baking and ice cream making, read our guide on
Grade B Maple Syrup: Your Secret to Rich Homemade Ice Cream.
Crafting Your Silky Smooth Custard: Ingredients & The Tempering Art
Creating the perfectly smooth, rich base for your
homemade maple ice cream involves a few key ingredients and one crucial technique: tempering eggs. This recipe builds a luscious custard that forms the foundation of its exquisite texture and flavor.
**Ingredients You'll Need:**
* **Maple Syrup:** As discussed, choose Grade B or the darkest available for the strongest flavor. This is the sole sweetener for our ice cream.
* **Eggs:** Specifically, we'll use egg yolks. These are essential for richness, emulsification, and the incredibly smooth, scoopable texture of the finished ice cream.
* **Whole Milk:** Provides a creamy base and helps create the right consistency for the custard.
* **Salt:** A pinch of salt enhances all the flavors, balancing the sweetness of the maple.
* **Heavy Cream:** The fat content from heavy cream is vital for the luxurious richness and prevents the formation of large ice crystals, ensuring that silky-smooth texture.
**How to Temper Eggs for Perfect Ice Cream:**
This recipe uses raw eggs, and therefore, tempering is a non-negotiable step. Tempering essentially means gently heating the egg yolks to raise their temperature slowly, preventing them from scrambling when introduced to hot liquids. This process is crucial not only for food safety (preventing salmonella) but also for creating a stable, lump-free, and perfectly emulsified custard base for your ice cream. It might sound a little intimidating, but it's quite straightforward with a bit of patience. For a more detailed walkthrough and tips on mastering this technique, consult our article
Tempering Eggs for Homemade Maple Ice Cream: A Simple Guide.
Here’s the step-by-step process:
1.
Prepare Egg Mixture: In a medium bowl, whisk together the maple syrup and your egg yolks until well combined and slightly lighter in color. Set aside.
2.
Heat Milk: In a medium saucepan, combine the whole milk and salt. Heat over medium-high heat, stirring occasionally, until it just comes to a boil. Immediately remove from the heat.
3.
Temper the Eggs: This is the critical step. While continuously whisking the egg yolk mixture, slowly pour about ½ cup of the hot milk into the egg yolks. **Do NOT add all the hot milk at once, or your eggs will cook and scramble.** This gradual addition brings the temperature of the eggs up gently.
4.
Combine Mixtures: Once the egg mixture is warmed, slowly pour it back into the large saucepan with the rest of the hot milk, whisking constantly to ensure everything is thoroughly combined.
5.
Add Cream: Stir in the heavy cream.
6.
Cook the Custard: Place the saucepan back over low heat. Cook, stirring constantly with a wooden spoon or spatula, making sure to scrape the bottom and sides of the pan. Continue cooking until the mixture thickens enough to coat the back of your spoon (it should leave a clear trail when you run your finger across the coated spoon). This typically takes 8-12 minutes. Be patient and **do not let it boil**, as this can curdle the eggs.
7.
Strain for Smoothness: Once thickened, immediately pour the custard mixture through a fine-mesh sieve into a clean bowl. This important step removes any tiny lumps or cooked egg bits, ensuring your ice cream base is incredibly smooth.
8.
Chill Thoroughly: Let the custard cool at room temperature for about 20 minutes. Then, cover the bowl with plastic wrap, pressing it directly onto the surface of the custard to prevent a skin from forming. Refrigerate overnight, or until it is thoroughly chilled (at least 6-8 hours). This chilling period is crucial for the best texture and allows the flavors to meld beautifully.
Churning, Ripening, and Serving Your Maple Masterpiece
Once your luscious maple custard is thoroughly chilled, you're just a few steps away from enjoying your exquisite
homemade maple ice cream.
1.
Churning: Remove the chilled custard from the refrigerator. Pour it into your ice cream maker and churn according to the manufacturer's instructions. Churning times vary depending on the model, but generally, it takes about 20-30 minutes until the ice cream reaches a soft-serve consistency.
2.
Ripening (Hardening): After churning, the ice cream will be quite soft. For that firmer, more scoopable texture, transfer the freshly churned ice cream to an airtight container. Press plastic wrap directly onto the surface of the ice cream before securing the lid. Place it in the freezer for at least 4-6 hours, or preferably overnight, to "ripen" or harden. This allows the ice cream to firm up properly and further develop its creamy texture.
3.
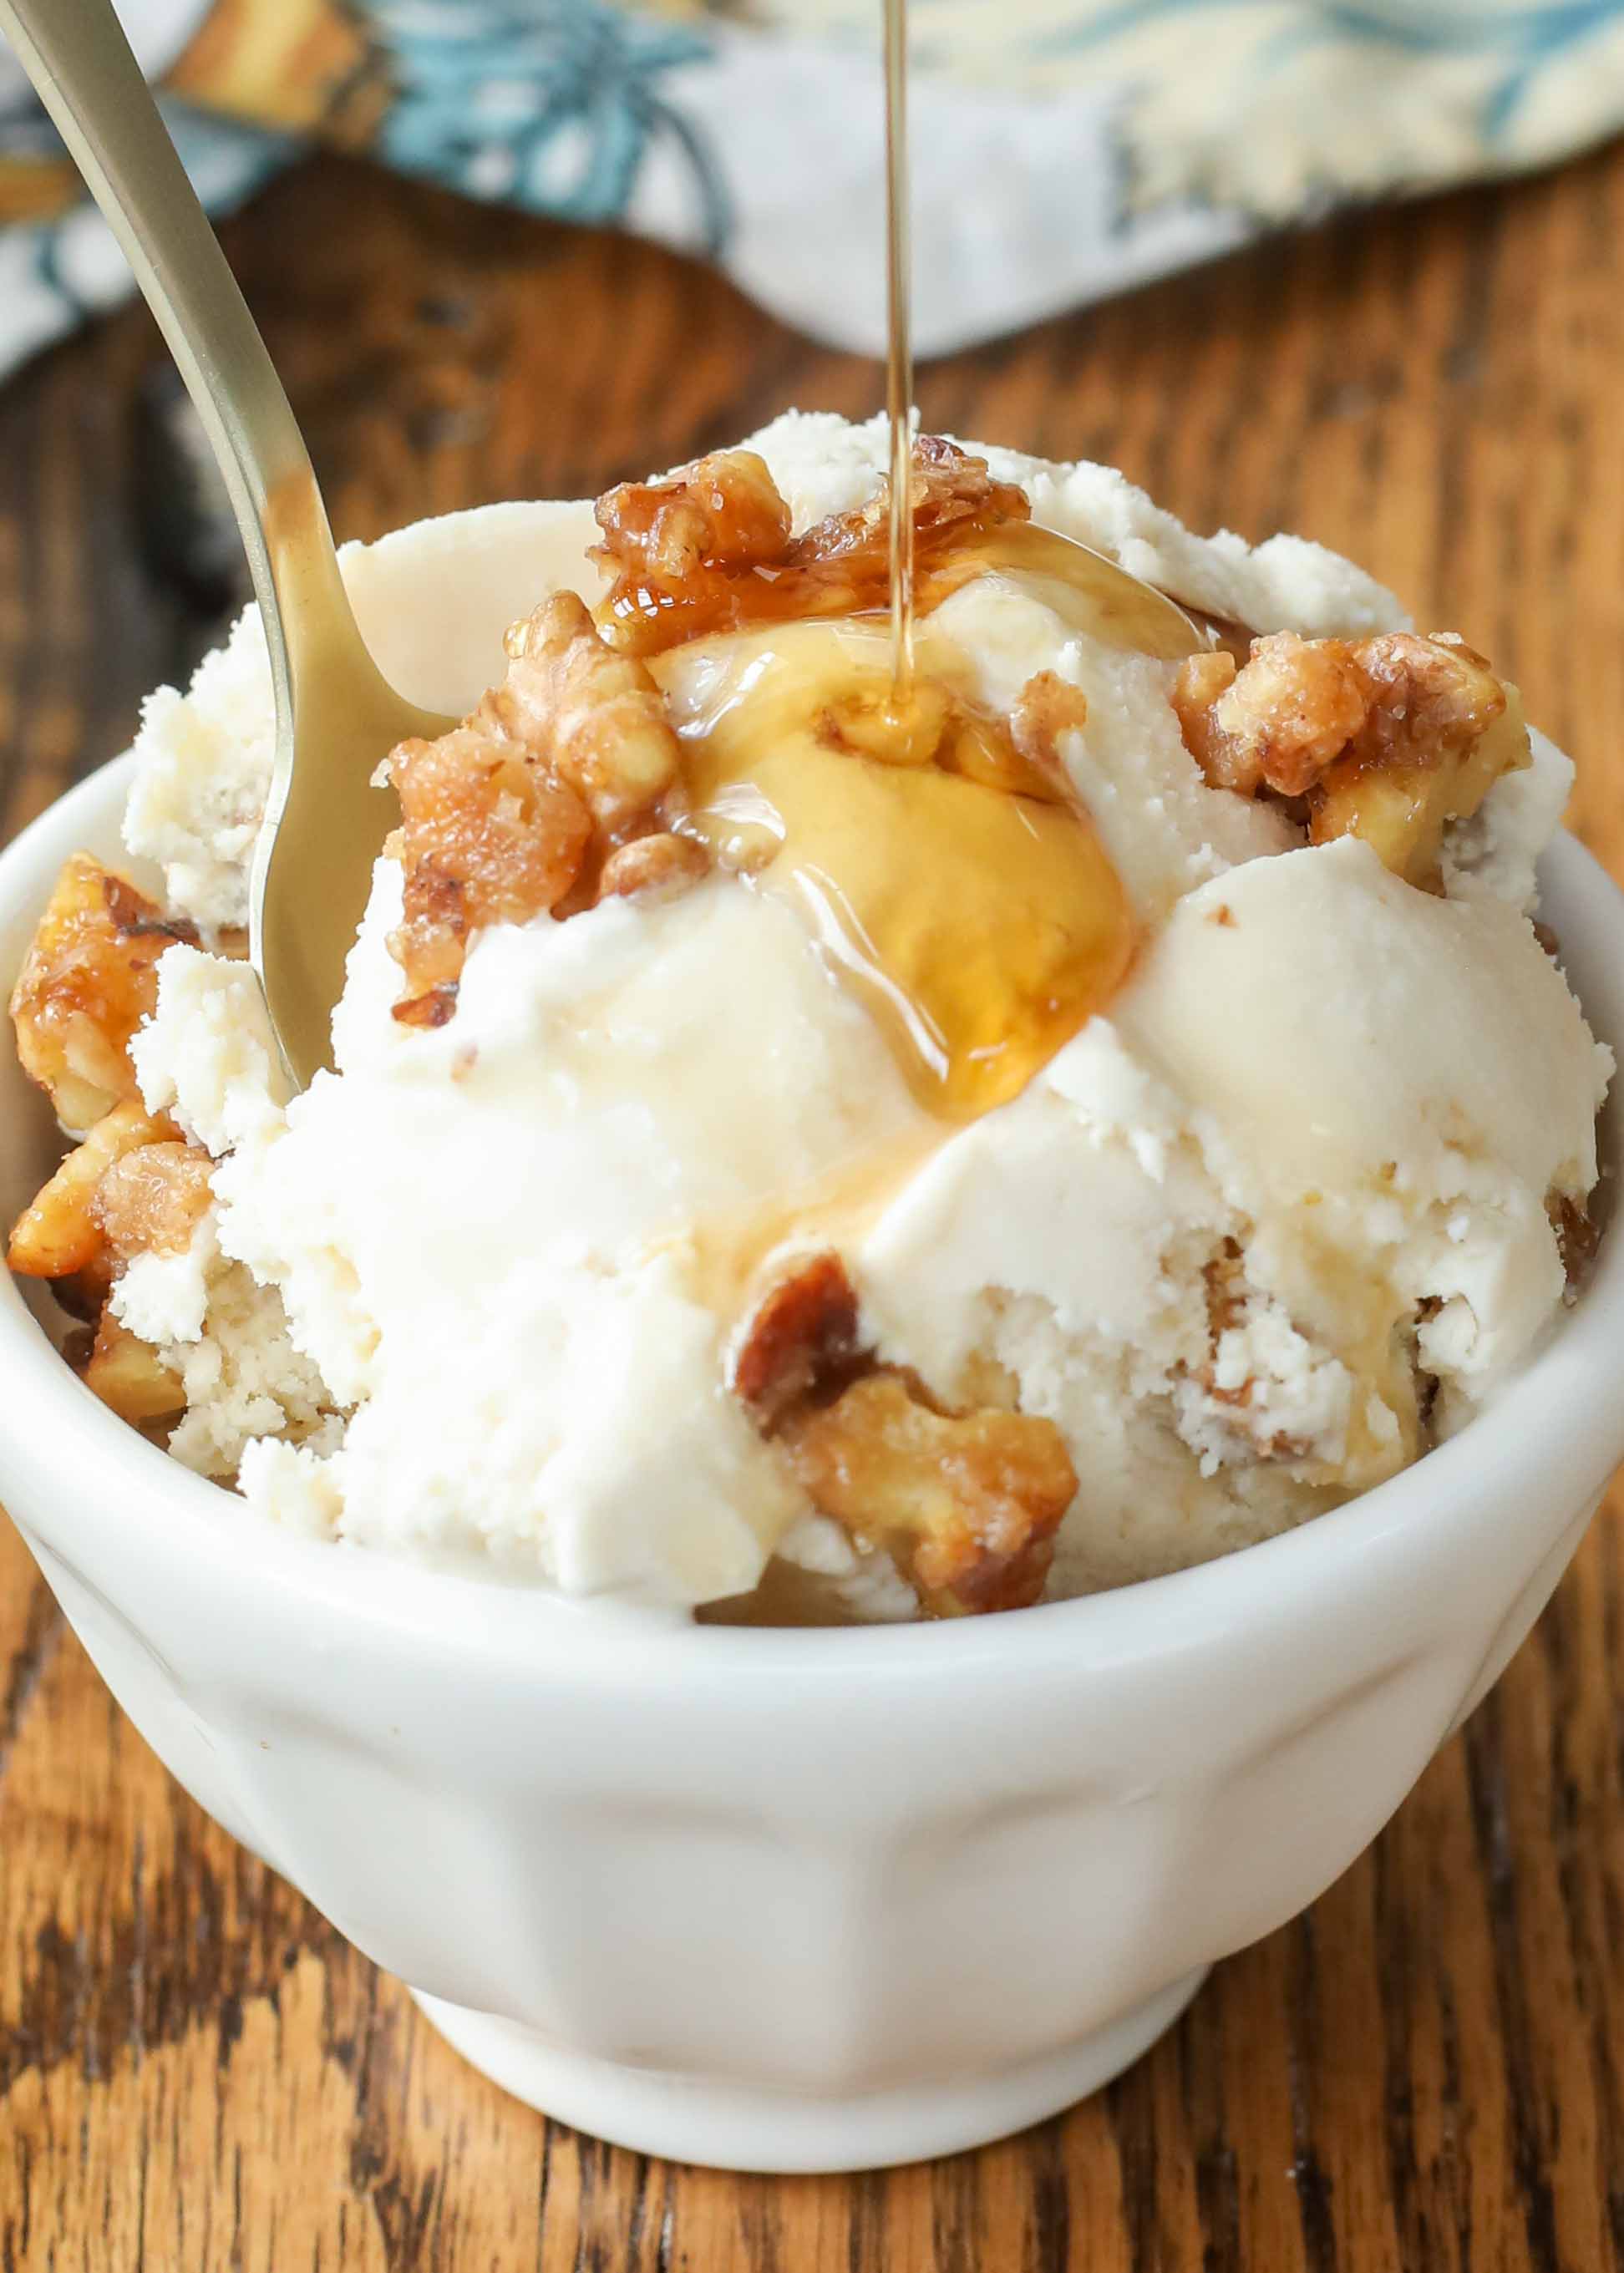
Serving Suggestions: The moment you've been waiting for! Serve your
homemade maple ice cream with your favorite fall desserts—warm apple crisp, classic pies, or even a simple bowl of baked pears. For an extra touch of maple magic, drizzle a little more real maple syrup over each scoop just before serving. It's also utterly delicious on its own, perhaps with a sprinkle of toasted pecans or a swirl of caramel sauce. Consider serving it with a shot of espresso for a delightful autumn affogato.
A Taste of Autumnal Perfection
There’s an unparalleled satisfaction that comes from creating something so delicious and comforting from scratch. This
homemade maple ice cream is more than just a dessert; it's a celebration of fall, a testament to the simple yet profound flavors of nature. From the careful selection of robust maple syrup to the meticulous process of tempering eggs and churning, every step contributes to a final product that is wonderfully silky smooth, bursting with authentic maple flavor, and utterly irresistible. So, this autumn, embrace the joy of homemade goodness and treat yourself and your loved ones to a scoop of this perfect fall indulgence. Your taste buds will thank you.